Domain Profiles allow you to create different WHOIS Settings, Registrant Information, and even DNS, which you can then apply individually or in bulk to your domain names in a programmatic way. To create domain profiles, follow these steps:
- Login to Epik.com, and navigate to your Domain Dashboard.
- There, click Account in the top black navigation bar, and then Domain Profiles.

- You’ll be met with a page with the list of the domain profiles you have. If you want to edit your default one, for example, click View / Edit Profile. To create a new one, click + Add a New Profile.

- On this creation page, you have access to the options – Registrant Information is mandatory, and DNS Records are optional (leave them empty so Epik doesn’t change any DNS settings when updating your profile). You can set one set of information and copy it to the registrant types fields, or set each individually.

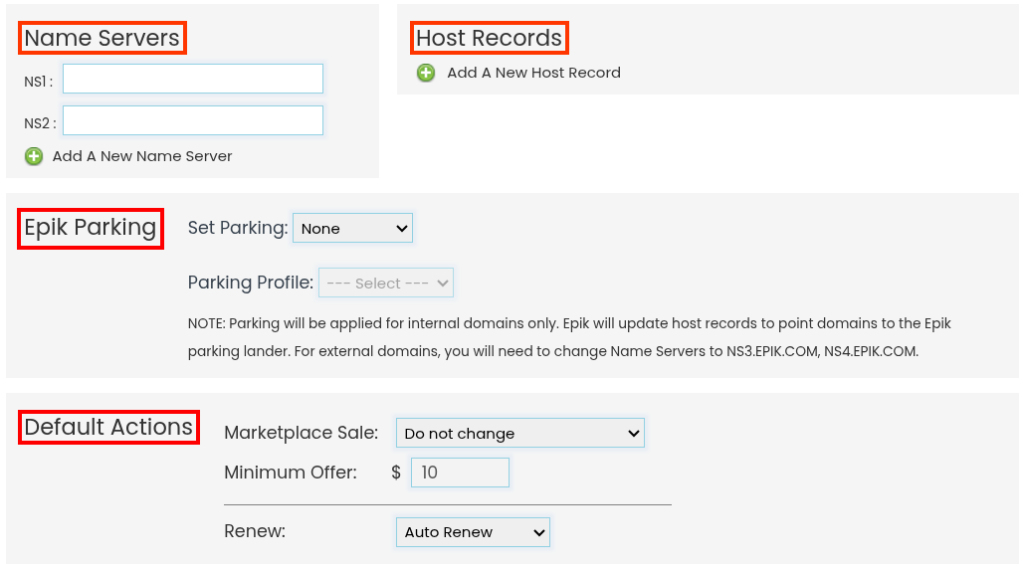
- Below you can add the DNS information you wish to set as default, such as the Name Servers, DNS Records, Parking and Marketplace settings, and billing cycle. When ready, you can set a name and description for the Profile for easy recognition, and Save.

You may apply a specific domain profile on the WHOIS and Registrant info pages, as well as when placing domain transfers.

