IP whitelisting is a security feature often used for limiting and controlling access to trusted users only. This feature allows you to create lists of trusted IP addresses or IP ranges from which your account can be accessed from.
Please do note it’s possible to get locked out of your account using this feature, so we recommend you make sure you’re not using dynamic IPs to prevent accidental loss of access.
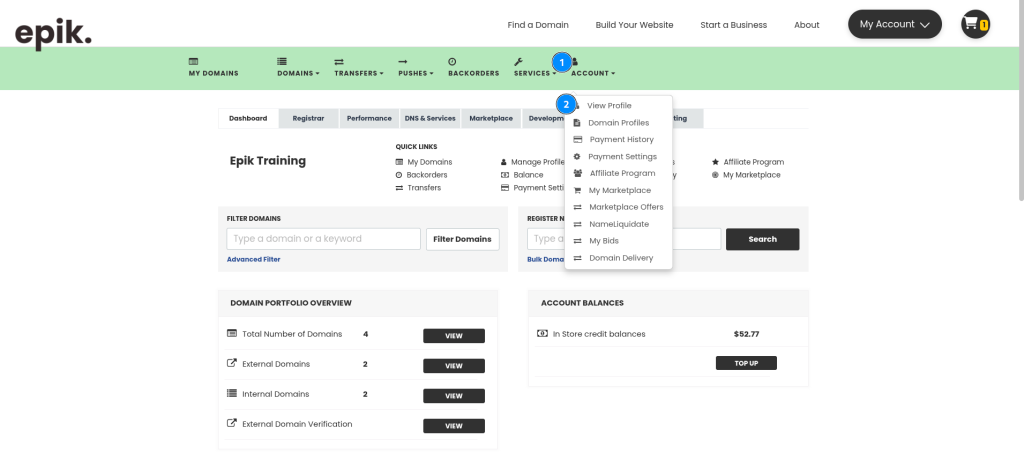
- Login to your Epik.com account and navigate to your Domain Dashboard.
- Click View Profile under the Account option in the top black navigation bar. Inside your profile.

- Click Security.
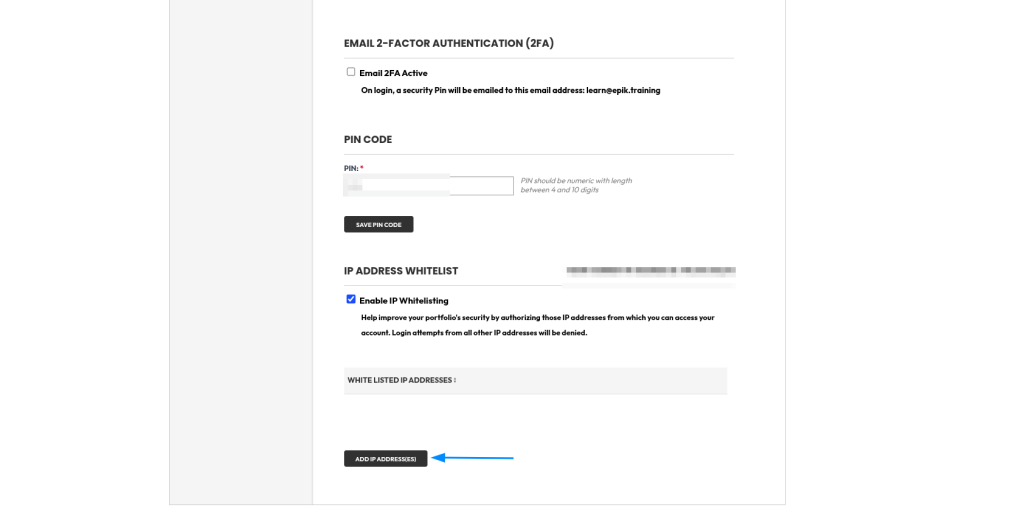
- Down at the bottom, you’ll find the IP Whitelisting option. Check the Enable IP Whitelisting box to enable the options. Click + Add IP Addresses, which will add one set of IPs. These can be set as Single or a Range. You may add multiple sets of IPs here.

- When ready, just click Save.
Now your Epik.com account is secured by IP Whitelisting and will reject any login from any IP that’s not on the defined list.

